I have a mixed feeling with gift card/gift voucher presents. True, it is the most practical gift ever, convenient for the giver and useful to the receiver. Yet, it usually lacks a sentimental touch and gives an impression that the gift giver is ‘slacking’ and can’t be bothered to take time thinking about a perfect gift for the receiver.
Ever wondered how to add a ‘wow’ factor to a not-so-presentable gift voucher or gift card? Here is a last minute gift wrapping idea.
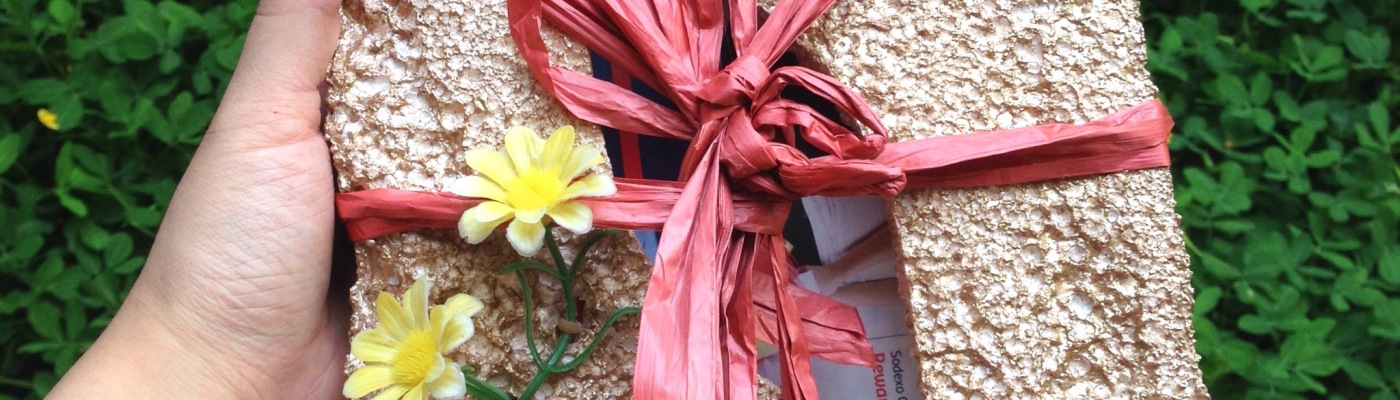
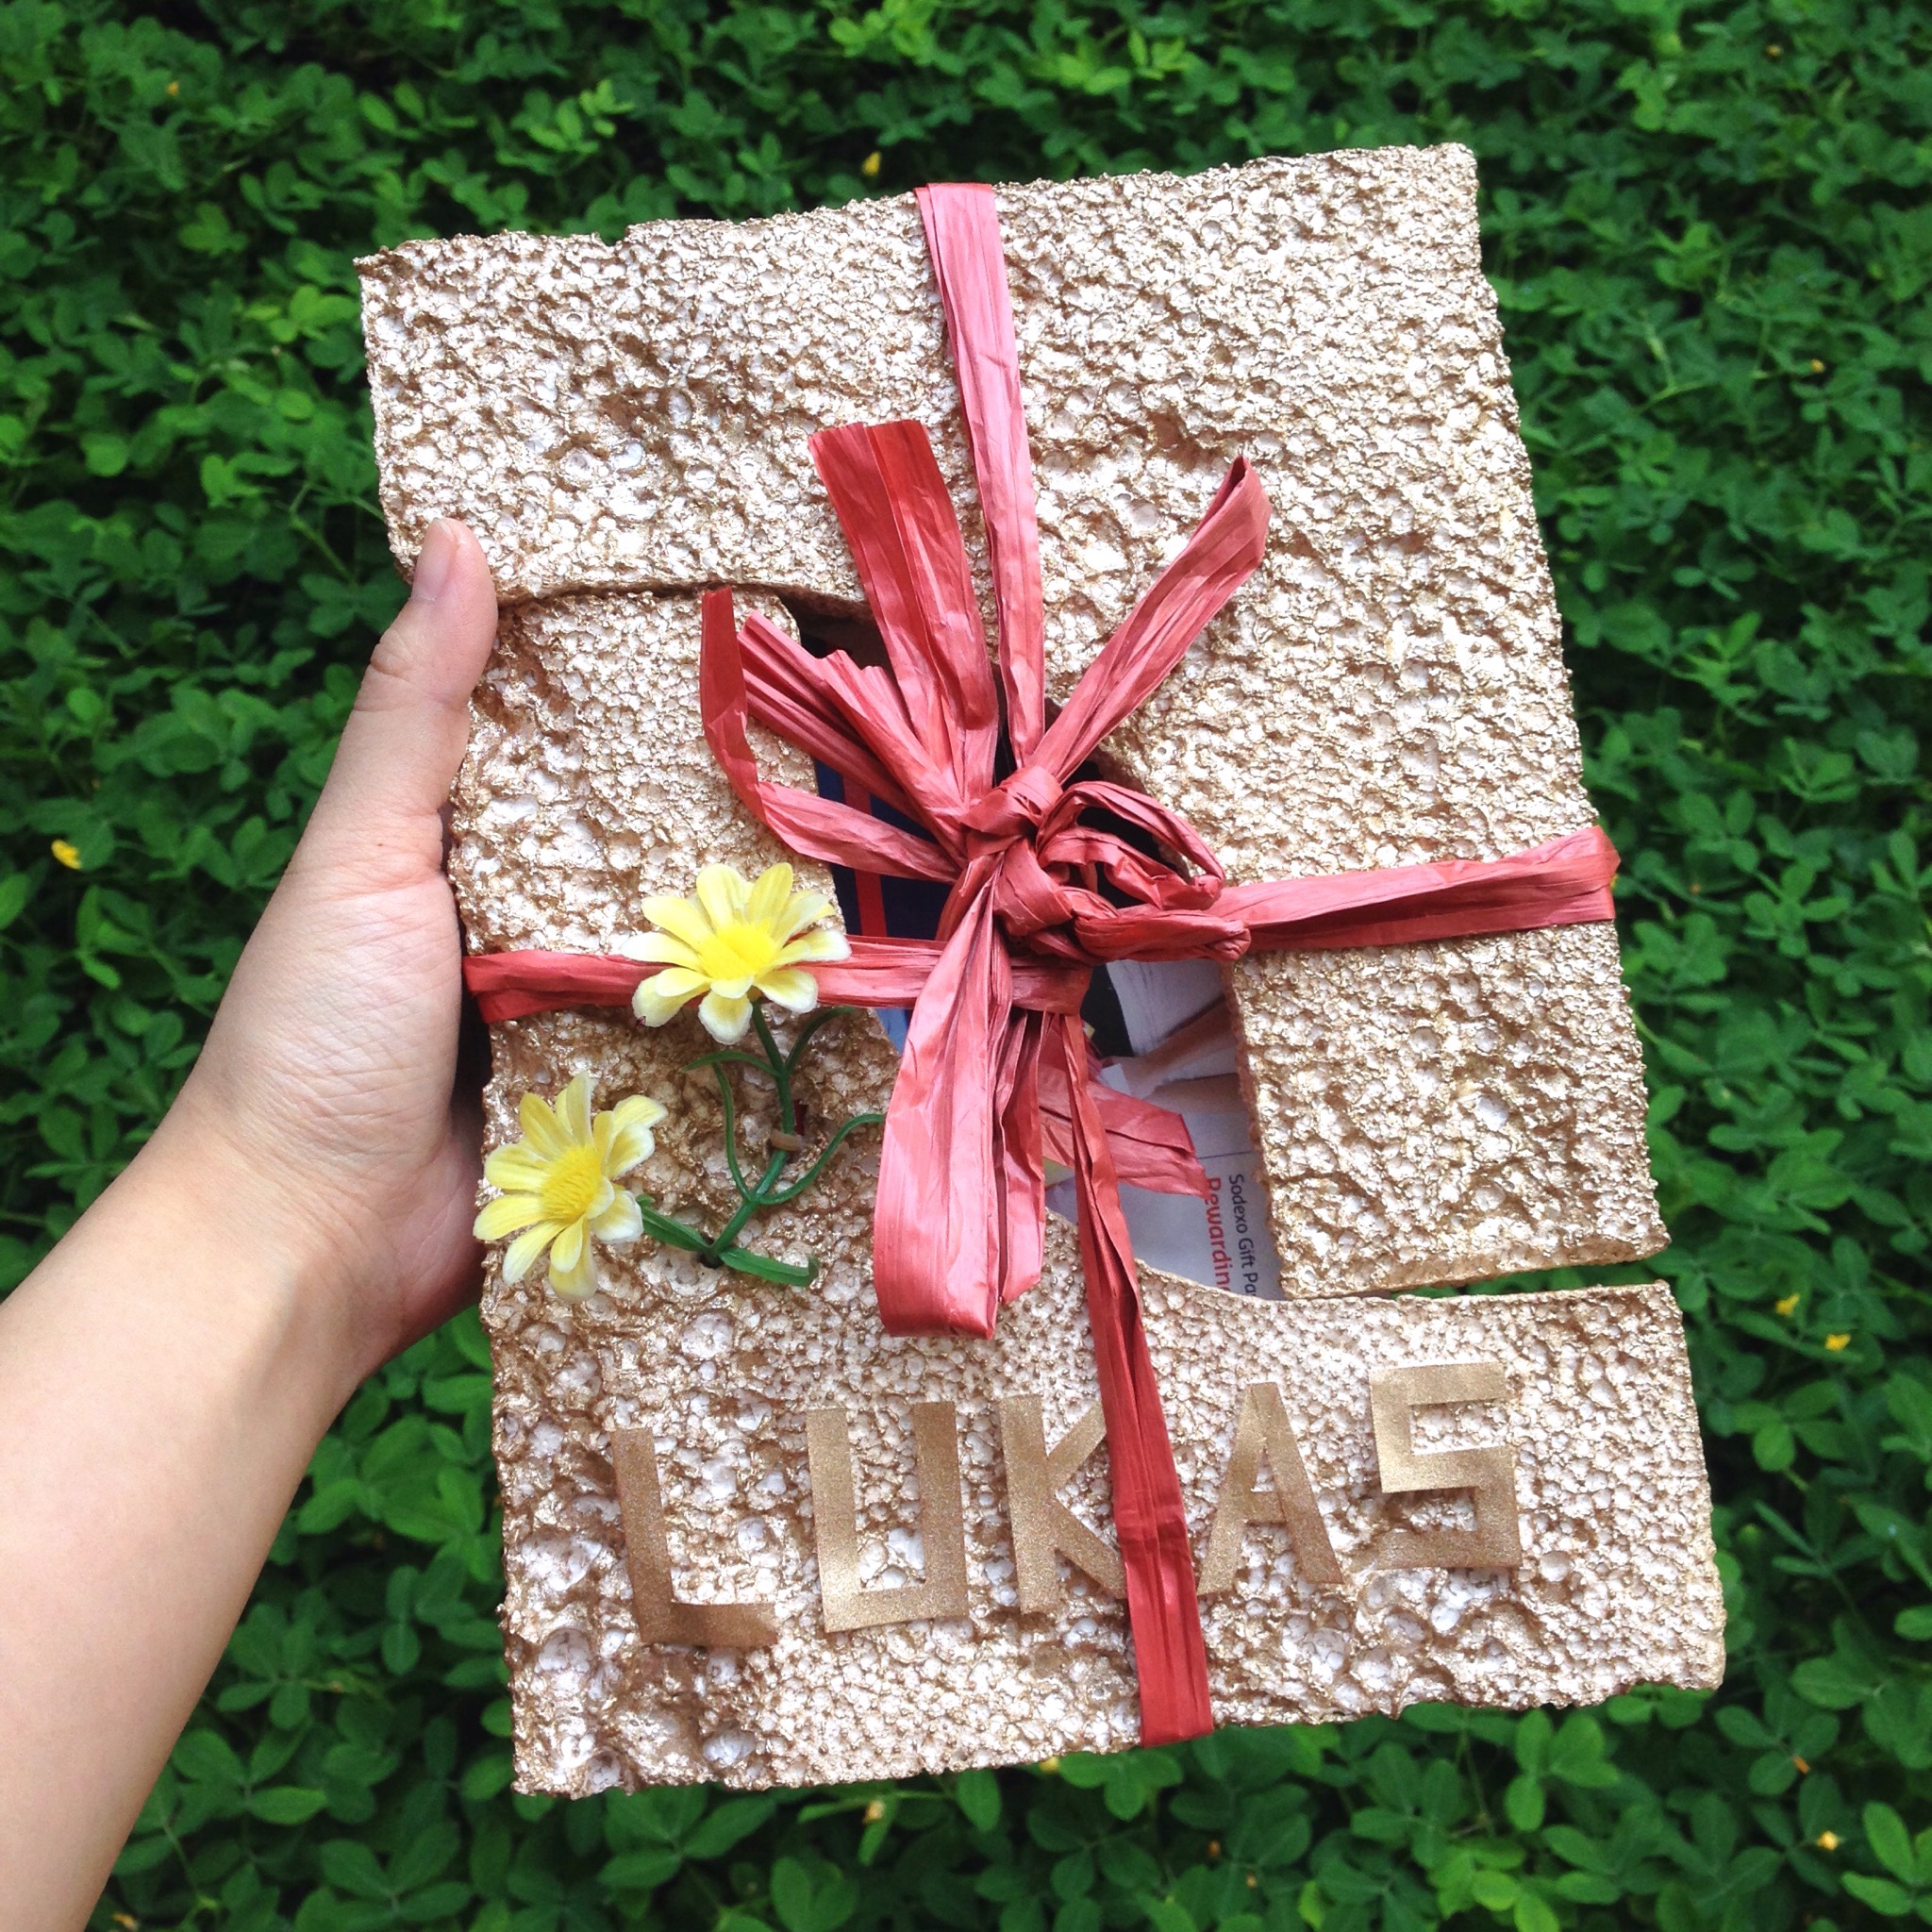
First, since the actual gift is only a small piece of paper, I’d like to disguise it into something big so that no one would have guessed what’s inside. Let’s keep the element of surprise in gift-giving tradition alive 😉 Initially I was searching for a sturdy B5 sized box at home but creativity hit me when I saw some styrofoam pieces lying around. We had plenty of those recently from unboxing electrical appliances. With some bronze spray paint I could recycle them into something amazing.
Materials:
2 right angle-ish styrofoam pieces
1 A4 paper (any paper will do) – optional
Bronze spray paint
Scissors
Glue
Pencil
Ruler
Fake flowers for decoration – optional
A rubber band to attach the flower- optional
A string or ribbon
Tutorial:
Tutorial:
- Optional: Write the recipient’s name on paper. Or just print it out.
Personalisation is always better. You can skip this step if it’s for a random gift exchange. - Cut and stick letters to the styrofoam.
- Add colour with a spray paint.
I like to put a newspaper underneath and use a box to prevent painting my whole room bronze.
The paint may ‘eat up’ some parts of the styrofoam because it is heavy. Don’t worry, this will give texture for a nice vintage vibe.
4. Optional: Decorate with fake flowers.
Use the stem to poke a hole on the styrofoam and plant in the flower.
Make another hole.
Tie upper part of stem with a rubber band and let through the hole.
Make a knot at the end of the rubber band.
Bonus: Make a customised card!
This was a store-bought plain red card with a cut-out front. Normally I would hand write the greeting but since it’s for a Secret Santa event, I don’t want the receiver to guess the gift giver that easily. That’s why I decided to cut and arrange letters from a magazine.

After that, put the gift voucher and the card in between two styrofoams. Arrange to form a rectangle. And finally, tie nicely with a string or ribbon. Done!

As a final touch, I wrapped it with newspaper because that’s the rule of Secret Santa, otherwise would put into a paper gift bag.
I love the texture, bronze sheen adds elegance, while yellow flowers add a lively contrast. What do you think?

Super fun idea! Yes I love the bronze color. Keep on being awesome! This is great. Thank you for sharing. 🙂
LikeLike
Thanks, dear!
LikeLiked by 1 person
This post is so interesting and inspiring! 🙂
I love your style! 🙂
https://fromdreamtoplan.wordpress.com/
LikeLike